Monday, April 1, 2013
Friday, March 29, 2013
Shrug+ Chiffon =Sweater Refashion #3
This
refashion all started when my friend Shannon came to work in a beautiful pink
sweater with a high low hem that had a surprise in the back, a beautiful
coordinating chiffon print floral.
It started me thinking how I could refashion sweaters using chiffon. Hmmm!
I
had this basic black shrug sitting in my closet that I never wear anymore. This was my most likely subject to try
something…but what?
Enter
this chiffon nightmare and then came the idea! Why not combine the two? I knew it would work when I saw it.
Here is the result of the mix! The tutorial follows right after.
After
First I cut off the sleeves of the chiffon top making sure to leave enough to fold over and finish the insides.
Pin the front and back to the chiffon blouse. Luckily, the lines of these 2 garments matched perfectly!
Sew the edges down, cut off the button, sew up the buttonhole, and I am almost done!
The last step is to baste and finish the inside sleeves to the seams of the sweater.
I love the outcome! When I wore it to work and out on my errands for the day, I had so many compliments. Refashioning is a passion and an addiction. I just love it! I have not shopped in the mall since, well, I can't remember the last time.
Over spring vacation I want to hit some thrift stores further away like Burbank and Huntington beach. I need more subjects for my fashion laboratory! FUN :)
Happy Easter and Happy Sewing and Refashioning!
Mary
First I cut off the sleeves of the chiffon top making sure to leave enough to fold over and finish the insides.
Pin the front and back to the chiffon blouse. Luckily, the lines of these 2 garments matched perfectly!
Sew the edges down, cut off the button, sew up the buttonhole, and I am almost done!
The last step is to baste and finish the inside sleeves to the seams of the sweater.
I love the outcome! When I wore it to work and out on my errands for the day, I had so many compliments. Refashioning is a passion and an addiction. I just love it! I have not shopped in the mall since, well, I can't remember the last time.
Over spring vacation I want to hit some thrift stores further away like Burbank and Huntington beach. I need more subjects for my fashion laboratory! FUN :)
Happy Easter and Happy Sewing and Refashioning!
Mary
Sunday, March 17, 2013
Thrift Shop Slip Dress to Refashioned Maxi Skirt!
Hi Everyone!
I know it has been a few weeks, but once again it has been report card time! Finishing report cards is an exhausting, time consuming process. But...Fear not! Report cards are finished, and I have been squeezing in precious moments to sew and refashion. I just haven't had a moment to put it all together for you until now. Take a look at my latest before and after...
BEFORE
A rayon slip dress with a great pattern! I just zipped off the top and made a foldover 3/4" elastic waist.AFTER |
Sunday, February 24, 2013
Sweater Refashion #2
Hi Everyone,
I had such fun with the last sweater refashion that I had to do another. The biggest problem with this refashion was that I accidentally trashed my picture of the BEFORE and I was already too far into the refashion to go back. Check out the transformation and the final product below.
At this point you can still see the BEFORE. It was a never worn, 100% cotton sweater that cost me $4.99 from Goodwill. It had long sleeves, a button front, and a fold over lapel collar. Very boring!
I wanted to make it into shaped cardigan with a scalloped edge and 3/4 sleeves.
So, I purchased some cotton lace in a matching color and applied it to the sweater with a chain stitch. Once the lace was set, I used the serger to take off the excess and crocheted down the raw edges from the inside to give it a finished look inside and out. I also shaped the side seams to fit using the same technique.
Here it is before I cut off the sleeves.
Here it is finished! I am really happy with the way it turned out and I am ready for more...
I would love to hear your comments.
Happy Refashioning!
Mary
I had such fun with the last sweater refashion that I had to do another. The biggest problem with this refashion was that I accidentally trashed my picture of the BEFORE and I was already too far into the refashion to go back. Check out the transformation and the final product below.
At this point you can still see the BEFORE. It was a never worn, 100% cotton sweater that cost me $4.99 from Goodwill. It had long sleeves, a button front, and a fold over lapel collar. Very boring!
I wanted to make it into shaped cardigan with a scalloped edge and 3/4 sleeves.
So, I purchased some cotton lace in a matching color and applied it to the sweater with a chain stitch. Once the lace was set, I used the serger to take off the excess and crocheted down the raw edges from the inside to give it a finished look inside and out. I also shaped the side seams to fit using the same technique.
Chain stitch application
Here it is finished! I am really happy with the way it turned out and I am ready for more...
I would love to hear your comments.
Happy Refashioning!
Mary
Saturday, February 16, 2013
My First Sweater Refashion!
![]() |
BeforeThis sweater started out as a 1X beauty. It cost $4.99 at Goodwill and appeared to have never been worn. |
Saturday, February 9, 2013
One 90's jean jacket +thrift shop collar =Refashioned Jacket
Hi everyone!
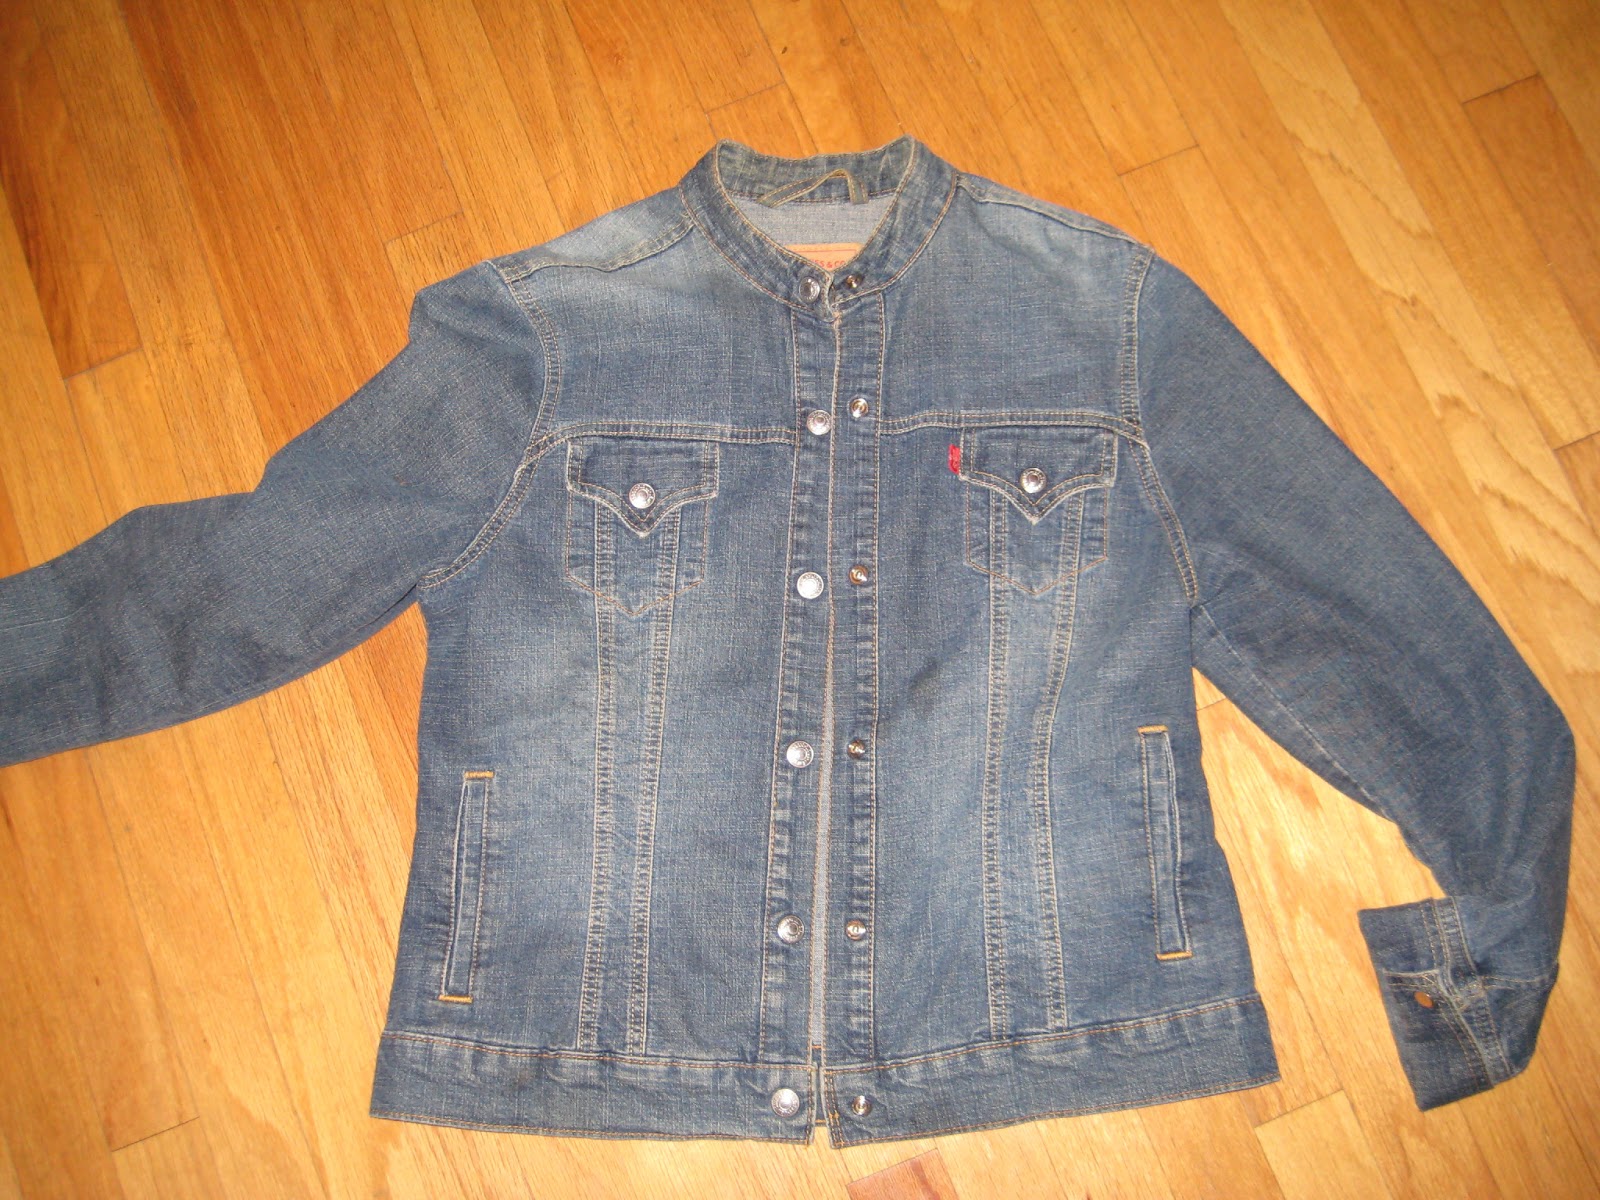
Meet my new favorite jean jacket. It started with and old mandarin collar jacket from the late 90's that had very little shape. I have been holding on to it for a long time hoping the right chance would come along to make it new. I think I found the right mix. Here is the finished project. Then, I'll show you how I got there.
As the picture states, all I did was add the collar. My second step was to take in the sides, under the armholes, and slightly slim the upper sleeve. From there I was done!
I am not done with the tapestry jacket. I have plans to use it for several other projects! More on the way...HAPPY SEWING and REFASHIONING!
Mary
![]() | |
| The finished project! |
![]() |
| A close up! |
| Take off the collar from here |
| Add it here! |
I am not done with the tapestry jacket. I have plans to use it for several other projects! More on the way...HAPPY SEWING and REFASHIONING!
Mary
Monday, February 4, 2013
Thrift Shop Refashion of Mens Dress Shirt
Hi
Everyone!
This
is the After!
Here
is the Before:
This
project turned out great, but it wasn’t an easy battle. I get very picky about fit and getting
the darts and pleats in all the right places took me a lot of time.
Step
1: Cut off the sleeves
Step
2: Take in the side seams and pin
the new darts and pleats in the front and back
Step
3: Fill in the armhole gap with a
gusset and redraw the armhole
Step
4: Cut a new sleeve using an
existing pattern out of the old sleeve
Step
5: Set and sew the sleeves
Step
6: Final fittings on the body and
permanently sew the changes.
Step
7: Press! Now it is ready to wear.
I paired it with a pair of leggings and my cap toe, ballet flats. Proof positive that a "fifty something" can wear leggings. My rule is the top must cover the bum and be long enough to cover the widest part of your legs. In addition, this top can be styled in numerous ways. I can see it with skinny jeans and black pumps. It would also be cute with capris and sandals for summer.
What do you think?
Happy sewing...Mary
I paired it with a pair of leggings and my cap toe, ballet flats. Proof positive that a "fifty something" can wear leggings. My rule is the top must cover the bum and be long enough to cover the widest part of your legs. In addition, this top can be styled in numerous ways. I can see it with skinny jeans and black pumps. It would also be cute with capris and sandals for summer.
What do you think?
Happy sewing...Mary
Subscribe to:
Posts (Atom)